All wrapped up. Tons of vibe on this old guitar.
This is a blog to share what I'm up to with my friends and family. I make and repair musical instruments for a living. I try to get outdoors as much as I can, exploring new places and having fun with my wife, Alice, and our dog, Maple. With the help of my loving parents, Mike and Sharon, I graduated Red Wing college in 2011, where I spent two years learning the trade of luthiery. Since then, I've been lucky to work for many happy customers, and see some amazing parts of the world.
Showing posts with label luthier. Show all posts
Monday, November 11, 2013
Saturday, April 6, 2013
1937 Martin O-17
After a long time of not posting, I'm re-dedicating myself to this blog. I was having some computer trouble, but now my girlfriend's spiffy Macintosh laptop is right by my chair, so I have no excuse.
Here's a repair that I did a while back. I guess this instrument got played a lot, and wound up stuffed away in a closet somewhere in New York. Finally a family member with an interest in guitar got his hands on it, and decided to get it fixed up, and playing well.
Sorry for the blurry photo, but there she is. A 1937 Martin O-17. Ben Brockway actually did the initial estimate, which addressed the frets, neck bow, neck angle, and the giant rib crack.
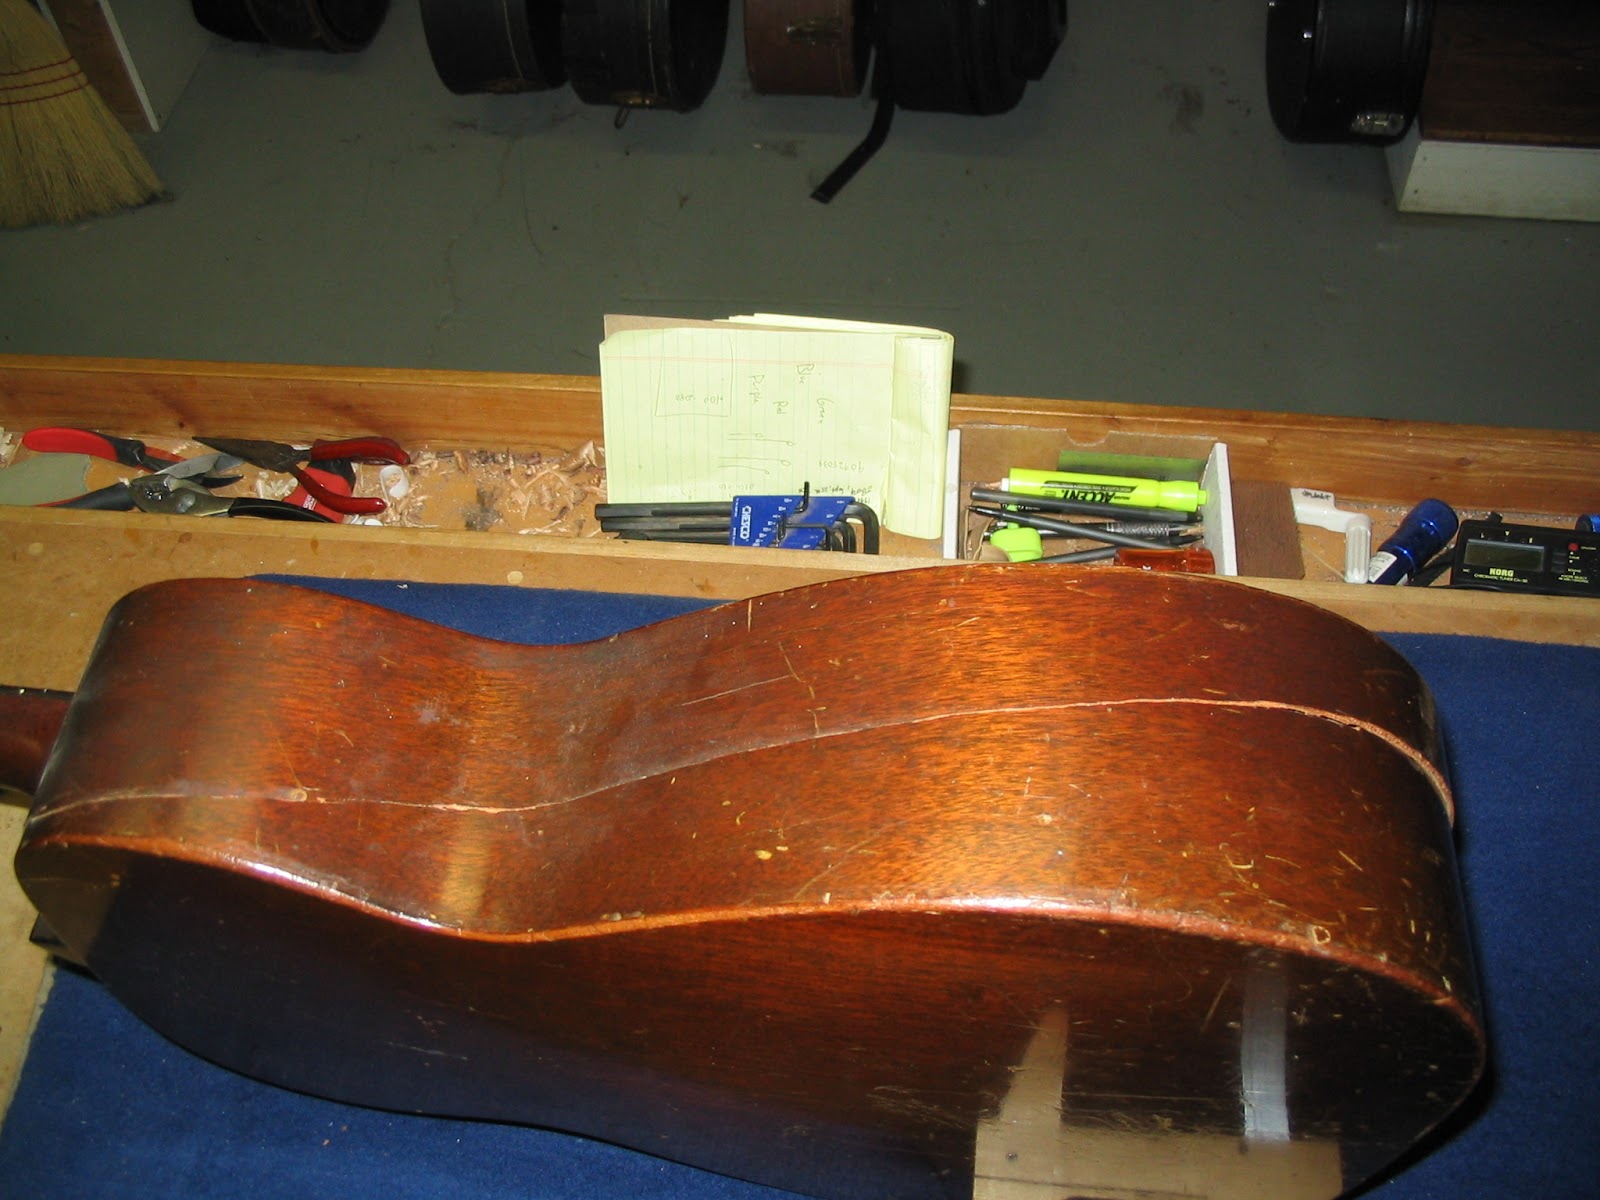
This is not something enjoyable to fix. A completely cracked through rib, from headblock to tailblock.
Here's an inside view. You can see that the linen patches didn't even try to stop the crack. Wooden rib braces probably wouldn't have either. In this case, the linen patches were a good thing, because they're easy to remove with warm water. Therefore they didn't hold up the rib from being repaired. Long story short, don't drop your guitar!
Here's a repair that I did a while back. I guess this instrument got played a lot, and wound up stuffed away in a closet somewhere in New York. Finally a family member with an interest in guitar got his hands on it, and decided to get it fixed up, and playing well.
Sorry for the blurry photo, but there she is. A 1937 Martin O-17. Ben Brockway actually did the initial estimate, which addressed the frets, neck bow, neck angle, and the giant rib crack.
Here's an inside view. You can see that the linen patches didn't even try to stop the crack. Wooden rib braces probably wouldn't have either. In this case, the linen patches were a good thing, because they're easy to remove with warm water. Therefore they didn't hold up the rib from being repaired. Long story short, don't drop your guitar!
There were three main ideas for how to fix this giant crack.
1) Remove the back of the instrument, thus enabling vast control over the crack in order to achieve a near perfect alignment. But with the risk of leaving scars, as guitar backs aren't made to be taken on and off.
2) Work in small sections and use CA glue. This would have probably yielded a very good alignment, but would have certainly left a large scar in the finish, even working as cleanly as possible.
3) Work in large sections (3) and use special clamps (shown above with the tuners) and turn buckle cauls through the sound hole, and get the alignment as close as possible.
I chose #3, and tried many clamping variations until I finally got it. In the end the whole crack went together well, and needed only a tad bit of flushing and finish touch up. Not too bad for a crack that had been open for the better part of 50 years.
After the rib crack was reinforced with cleats and new linen patches, it's time to do this instruments neck reset. The hide glue Martin used gave way to steam after maybe a minute.
I start with getting the new angle established, and then fit the heel perfectly back to the body.
Awww yeah. Lookin good.
Now I get the joint itself fitting well again, using some full length mahogany shims. Chalk fit that thing back together, and...
Mix up some fresh hide glue for good measure. Pre-war Martin's deserve the best!
Not too many things get your blood pumping like watching hide glue ooze out of a tight dovetail.
Always a good feeling when it's still right after the clamps come off!
The frets gotta go! Pulling frets out neatly always fills the repair room with that odd smell of "concentrated antique store."
Impressive stuff here. This neck only moves .005" under string tension, and over 80 years of string tension have only warped it .005".
All it takes to nail that perfect .002" relief is to put in about .003" of back bow. I feel comfortable doing this, because I'll be putting in frets with the same tang size.
It really puts a smile on your face when frets seat perfectly. I checked about 4 times before I realized, I didn't have to do any fret leveling at all.
Time now to make the new saddle. Because somebody decided to glue in the old saddle, I get the pleasure of sawing it in half, and carving the pieces out.
Don't glue saddles in folks, saddle gluers go to the special hell, with child molesters and people who talk during movies.
After a new nut and saddle, this guitar is a pleasure to play, and really great to listen to also.
Sunday, August 19, 2012
New Upright Bass Fingerboard
Last month, I realized I was wrapping up my first year as a professional instrument repairman. It had been a great year, regular maintenance repairs, brace repairs, crack repairs, and some neck resets and broken headstocks too. I really hadn't had the chance to do anything outside of the realm of what I learned at Red Wing.
While I did learn how to make a violin fingerboard, and knew how to keep my block plane sharp; making a new bass fingerboard from a chunk of wood the customer brought in with their instrument was going to be a process in itself.
After waiting as long as possible for the piece of cherry to acclimate to the shop's humidity level, it was finally time to put the bass on the bench and take off the old fingerboard.
Note: This bass had a cherry fingerboard (a very thin one), using only North American woods was a choice by the builder of the bass, as well as a preference of its current owner (who is a very good friend of mine, and the shop). The old fingerboard was warping, and really couldn't be dressed at all, so the new fingerboard was to be much thicker; at the same time this would make the instrument more comfortable for the player.
Supposedly this heat blanket was originally designed to keep space craft warm, then it was sold to luthiers to heat ribs in the bending process. Here it's working hard to loosen up some glue.
This picture was taken hours into the process. The use of aliphatic resin glue, and (surprise) locating pins, made this task tedious.
It came off pretty clean. Now it was time to start turning the large piece of cherry into a fingerboard. Much of this was done by Tom, who basically got the wood into the wedge state for me.
I copied the two radii of the old fingerboard, made templates and here I'm starting to put that compound radius on the new fingerboard. When your plane cuts ebony cleanly, cutting cherry just puts a smile on your face.
So here the radius is roughed out, the next step was putting in the decorative swoop at the end of the fingerboard, and then waiting until it's glued on to do the final dressing. I believe the state it's in now is basically a fingerboard "blank."
The customer wanted to re-use the old bridge. Even though it had height adjusters, the new fingerboard's thickness would make the projection too high. So Here I'm planing the neck to compensate for that. I think about .75mm was all that came off the overstand.
The glue up went really nice, and I didn't have much material to remove to bring the fingerboard flush to the neck.
After gluing the fingerboard on, I suspected it would move a little bit. So I just got the fingerboard flat, and then I'd check it the next day, and flatten out any movement. I think about 5 or 6 days after glue up, it was stable enough to do the final dressing; which is what's going on in this picture. The customer has a really aggressive style, so I went with a bit more scoop than usual, and optimized it for the 3rd position.
And at this stage, it's basically done. We can now see that decorative swoop I had talked about. It's based on an Upton Bass "Hawkes" model (which is the customers other upright).
I failed to grab a photo of the instrument strung back up, because minutes after it was done, it was in a car headed for a gig in Brevard. Also, about two days after leaving the shop, it was being played outside on a humid day that was about 95 degrees. Talk about testing it out!
While I did learn how to make a violin fingerboard, and knew how to keep my block plane sharp; making a new bass fingerboard from a chunk of wood the customer brought in with their instrument was going to be a process in itself.
After waiting as long as possible for the piece of cherry to acclimate to the shop's humidity level, it was finally time to put the bass on the bench and take off the old fingerboard.
Note: This bass had a cherry fingerboard (a very thin one), using only North American woods was a choice by the builder of the bass, as well as a preference of its current owner (who is a very good friend of mine, and the shop). The old fingerboard was warping, and really couldn't be dressed at all, so the new fingerboard was to be much thicker; at the same time this would make the instrument more comfortable for the player.
Supposedly this heat blanket was originally designed to keep space craft warm, then it was sold to luthiers to heat ribs in the bending process. Here it's working hard to loosen up some glue.
This picture was taken hours into the process. The use of aliphatic resin glue, and (surprise) locating pins, made this task tedious.
It came off pretty clean. Now it was time to start turning the large piece of cherry into a fingerboard. Much of this was done by Tom, who basically got the wood into the wedge state for me.
I copied the two radii of the old fingerboard, made templates and here I'm starting to put that compound radius on the new fingerboard. When your plane cuts ebony cleanly, cutting cherry just puts a smile on your face.
So here the radius is roughed out, the next step was putting in the decorative swoop at the end of the fingerboard, and then waiting until it's glued on to do the final dressing. I believe the state it's in now is basically a fingerboard "blank."
The customer wanted to re-use the old bridge. Even though it had height adjusters, the new fingerboard's thickness would make the projection too high. So Here I'm planing the neck to compensate for that. I think about .75mm was all that came off the overstand.
The glue up went really nice, and I didn't have much material to remove to bring the fingerboard flush to the neck.
After gluing the fingerboard on, I suspected it would move a little bit. So I just got the fingerboard flat, and then I'd check it the next day, and flatten out any movement. I think about 5 or 6 days after glue up, it was stable enough to do the final dressing; which is what's going on in this picture. The customer has a really aggressive style, so I went with a bit more scoop than usual, and optimized it for the 3rd position.
And at this stage, it's basically done. We can now see that decorative swoop I had talked about. It's based on an Upton Bass "Hawkes" model (which is the customers other upright).
I failed to grab a photo of the instrument strung back up, because minutes after it was done, it was in a car headed for a gig in Brevard. Also, about two days after leaving the shop, it was being played outside on a humid day that was about 95 degrees. Talk about testing it out!
Subscribe to:
Posts (Atom)